Interested in selling products to support your nonprofit’s mission? This fundraising method is legal for tax-exempt organizations, as long as you follow relevant tax guidelines.
To establish a reliable revenue stream, provide supporters with an intuitive and convenient way to purchase your products online. Traditional e-commerce platforms often lack features tailored to nonprofits and can create additional administrative work for your staff, including inventory management and shipping.
In this guide, we’ll answer your questions about nonprofit ecommerce and take a deep dive into the top ecommerce platforms to help you make a decision:
- Can nonprofits legally sell merchandise?
- What are the benefits of selling custom merchandise?
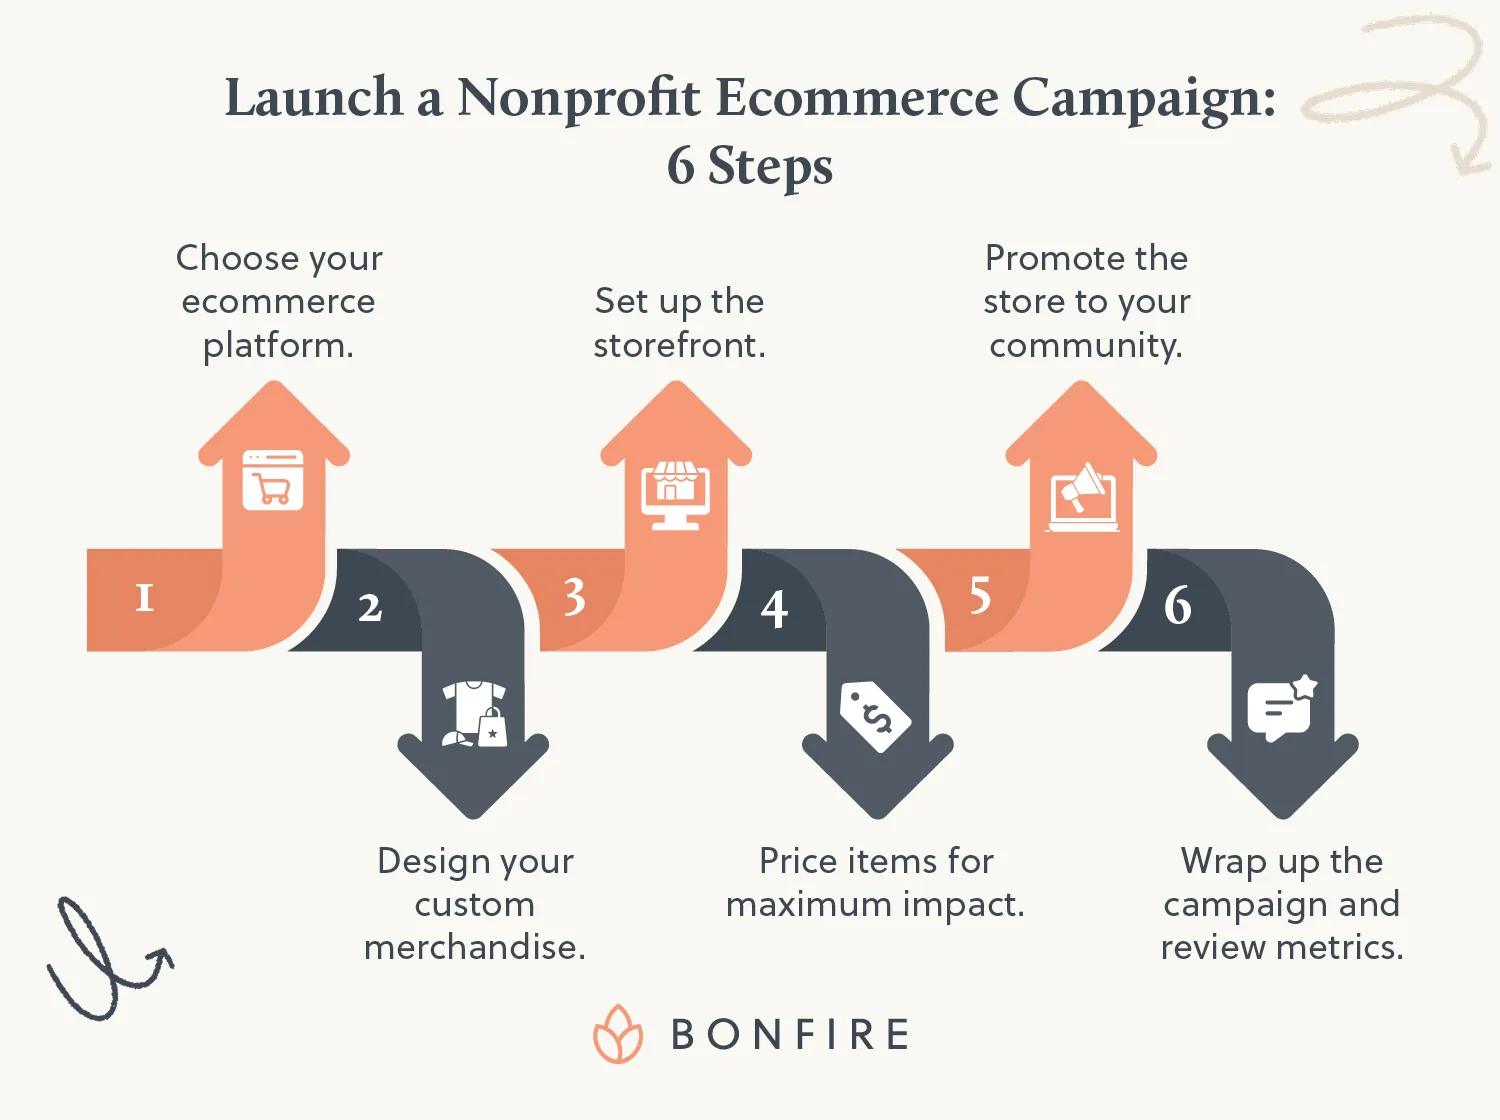
- 6 Steps to Launch Your Nonprofit Ecommerce Campaign
- Tips for Success in Nonprofit Ecommerce
Can nonprofits legally sell merchandise?
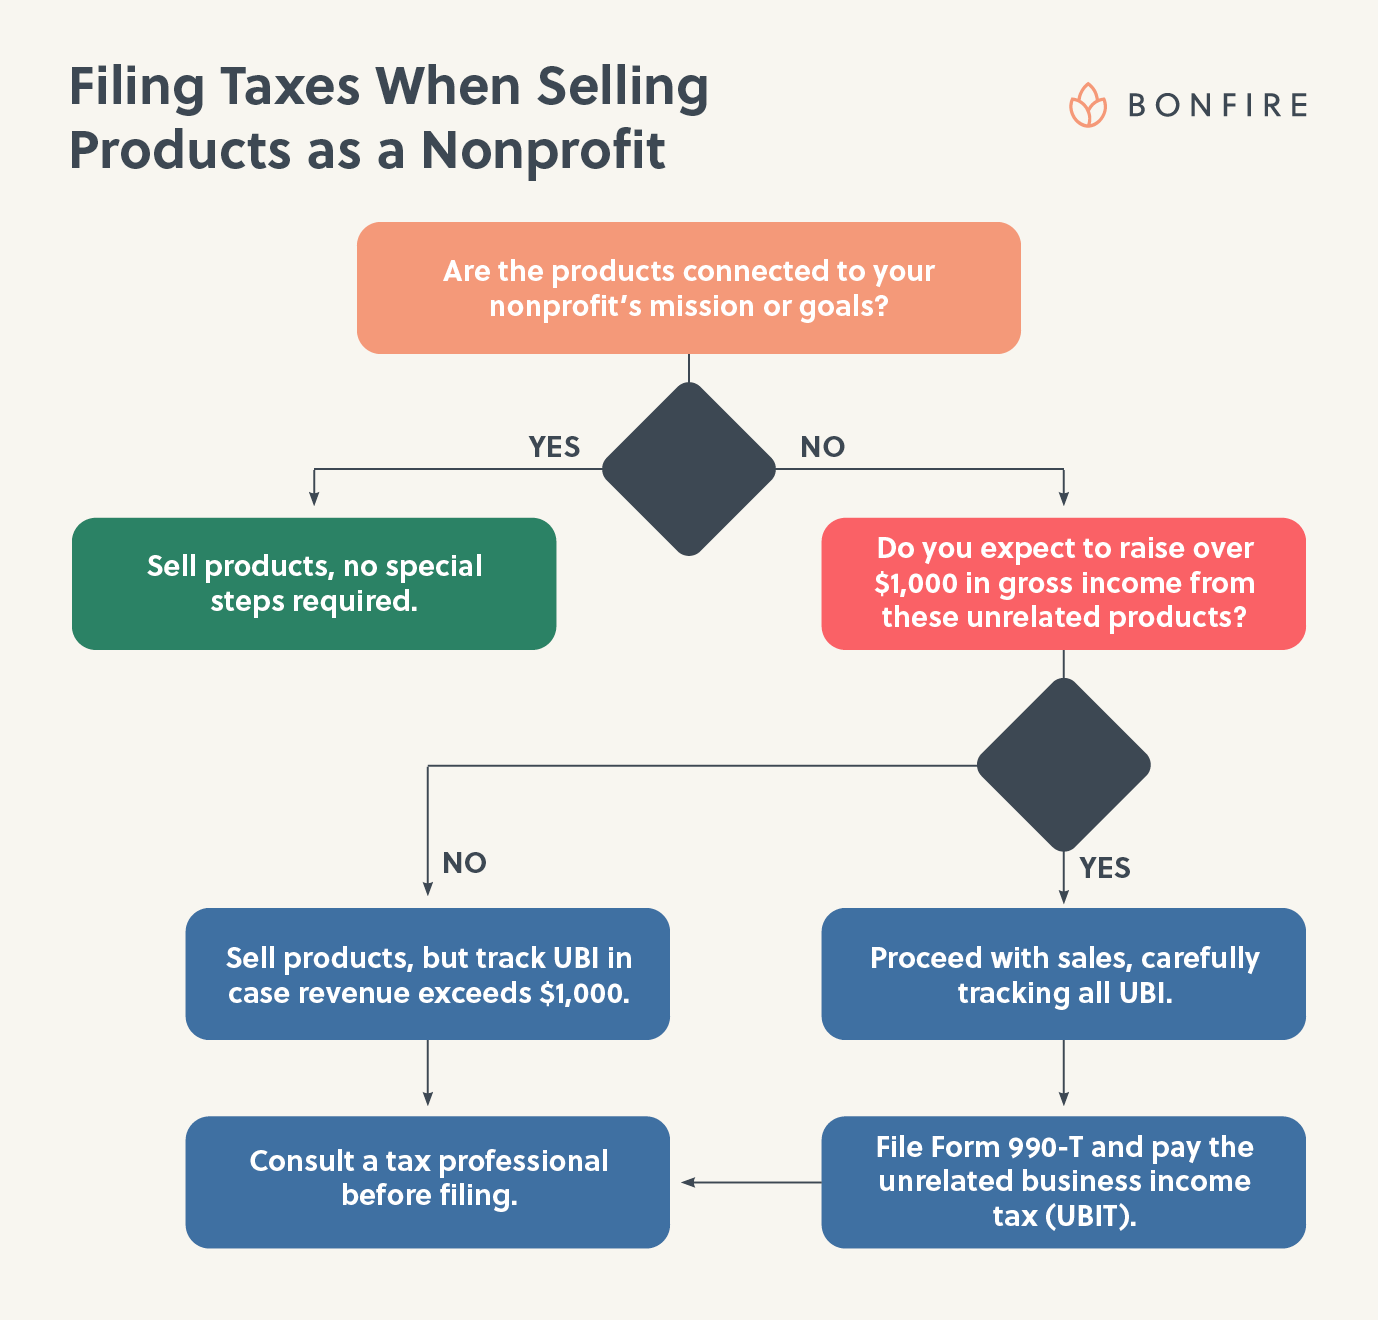
Yes, nonprofits can legally sell merchandise, provided the products are directly related to your mission or mission-aligned goals. Additionally, your nonprofit does need to be aware of specific tax rules:
- Unrelated Business Income Tax (UBIT) regulations: This tax typically applies to nonprofits that sell products that are not substantially related to their mission. In these cases, the IRS might require you to pay taxes on those specific profits. Seek guidance from a certified tax professional to determine whether your nonprofit will be subject to these taxes and to ensure full compliance.
- Form 990-T: If your nonprofit raises over $1,000 in gross income by selling products unrelated to your mission, you must also file a Form 990-T to remain compliant, fully transparent, and tax-exempt.
The following flowchart can help you determine whether these rules apply to your nonprofit, but we also recommend working with a professional to clarify any points of confusion:
Ensuring the items you sell are mission-aligned is crucial for maximizing revenue and retaining your nonprofit’s tax-exempt status. Printing your logo on apparel, weaving educational messaging directly into your product designs, or choosing items with functionality that supports your mission strengthens the argument that the items are fundamentally tied to your exempt purpose.
For example, a skin cancer awareness organization might design custom hats and UV-protection sun shirts.
What are the benefits of selling custom merchandise?
Nonprofit ecommerce provides a reliable stream of unrestricted funds that your nonprofit can use for its most urgent needs. Nonprofit ecommerce offers benefits like:
- Predictable income: These campaigns allow you to shift away from episodic, high-stress fundraising events and stop relying solely on competitive funding sources like grants. Additionally, consistent funding enables you to forecast annual budgets more accurately and plan confidently for the future.
- Securing free offline advertising: Each time a supporter wears a branded t-shirt, they become a walking billboard for your mission. This organic visibility introduces your organization to entirely new local networks, generating awareness without costing a single dime in ad spend.
- High donor participation: Your community genuinely wants to support your organization by purchasing products that support your mission. 45% of donors regularly purchase from an online store that supports a nonprofit, underscoring how tangible goods provide an immediate sense of reward for their financial contribution.
Steps to Launch Your Nonprofit Ecommerce Campaign
1. Choose your ecommerce platform.
Start with a solution that prioritizes simplicity and nonprofit-focused functionality over complex features your organization may not even need. While popular platforms often offer extensive customization, they can require technical skills and ongoing maintenance that your team doesn’t have the time or expertise to handle.
To help you decide, we’ve put together a comparison of the most popular platforms for nonprofit ecommerce:
| WooCommerce | Shopify | Bonfire | |
|---|---|---|---|
| Price | The core plugin is free, but hosting ($25-$350 per month) and extensions ($29-$299 per year) cost extra. | Basic plans start at $29 per month. | 100% free platform with no monthly fees. |
| Developer needed? | Not always, but developers are needed for custom functionality, integrations, themes, and PCI compliance. | No, but there may be a steep learning curve for setting up and optimizing the store. | No. Setting up a campaign and store is quick and easy for anyone. |
| Inventory management | Manual for updating new shipments or syncing inventory, but automatically updates stock in response to online purchases. | Automatic inventory level tracking, with some manual workflows (unless integrated with third-party apps). | Zero inventory management, as products are printed on demand. |
| Fulfillment & logistics | Organizations handle all shipping and logistics. | Organizations handle all shipping and logistics. | Bonfire handles everything, including printing, shipping, and customer service. |
| Nonprofit-specific tools | Requires building custom solutions or leveraging specialized plugins. | Requires integrating third-party apps. | Offers various nonprofit features, including built-in CSV donor downloads, reduced fees, donation collection, and integrations with providers like GoFundMe. |
WooCommerce
The WooCommerce plugin allows users to create a customizable, open-source ecommerce store on a WordPress site. While the plugin gives you total control over your digital storefront, it comes with heavy technical responsibilities, such as:
- Purchasing a separate server hosting.
- Installing the core open-source WordPress CMS (if you haven’t already).
- Configuring the WooCommerce plugin framework, which involves setting up the underlying digital engine so your store is fast, secure, automatically calculates taxes and shipping, and connects seamlessly to your donor databases.
Additionally, your internal team or a hired developer is solely responsible for the site’s security and maintenance. Typically, this means managing SSL certificates for PCI compliance, continuously updating plugins to mitigate vulnerabilities, and manually configuring API keys for payment gateways such as Stripe or PayPal. This can create a significant administrative burden for small organizations seeking a simple way to boost funding.
Shopify
Shopify is a popular software-as-a-service (SaaS) solution designed primarily for traditional retail businesses. It provides a polished storefront out of the box, but the platform may require costly workarounds to fit nonprofit and print-on-demand needs.
While Shopify does automatically handle website hosting and credit card security, it still requires some technical setup. You will need to link your organization’s website address to Shopify and use their template tools to build the store. If your nonprofit needs the store to automatically send data to your donor tracking system, the built-in tools usually aren’t enough—in this case, you will need help from a programmer.
Because Shopify is designed for regular retail rather than nonprofits, it doesn’t include features for collecting donations. This means you will need to install separate apps and ensure they integrate with your full tech stack. Additionally, many of these apps charge monthly fees on top of what you pay for Shopify.
Bonfire
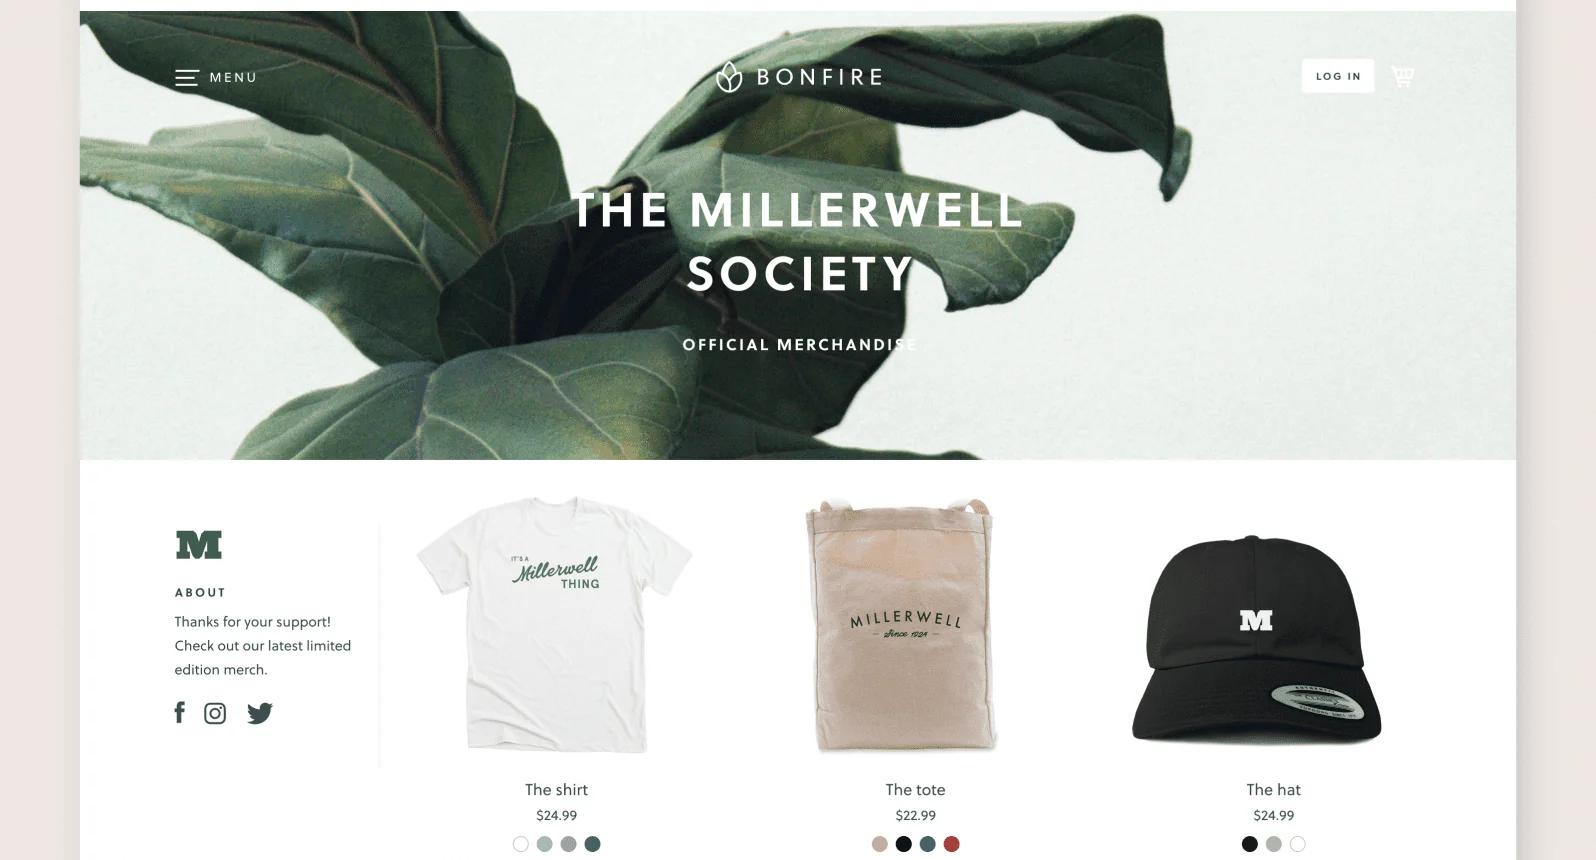
Bonfire is a specialized fundraising platform that allows nonprofits, individuals, schools, and other organizations to create and sell custom products, such as t-shirts, drinkware, and home goods. It offers completely free storefronts that your organization can quickly customize with its branding and messaging, making it easy to sell your products to supporters.
With Bonfire, you can set up your online store in just three steps:
- Set up your Bonfire account.
- Click “Create My Store” or the “My Store” tab on the dashboard.
- Customize your store with your organization’s name, branding, and story. You can change these details at any time, with no coding required.
Then, you’re ready to add your merch campaigns—no complicated server hosting setup or plugin management required. All you have to do is log in and start building your store.
Additionally, once you design your merchandise and launch the campaign, our team will handle the rest. Our system automatically processes payments, and we oversee printing, shipping, and customer service. And because Bonfire uses a print-on-demand model, you’re not required to order products ahead of time. Everything functions seamlessly in the background, freeing up your staff to focus solely on marketing the campaign.
2. Design your custom merchandise
Creating appealing merchandise involves balancing your nonprofit’s mission and visual identity with your community’s preferences and everyday usability. In other words, your goal is to design merch people actually want to use while staying true to your core mission.
Consider these tips when designing your custom merch:
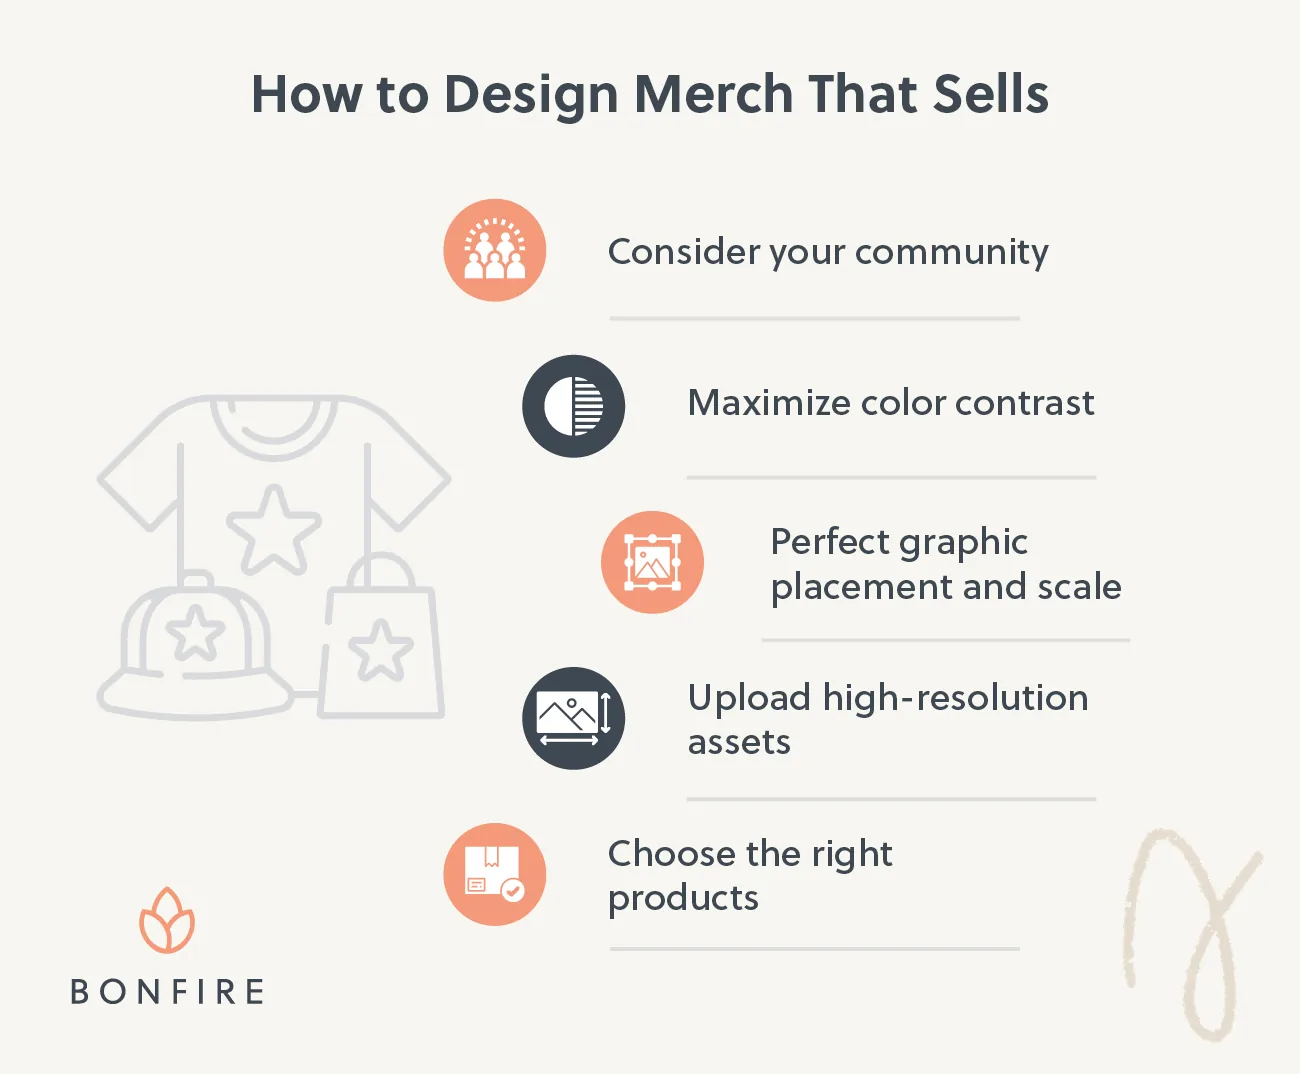
- Consider your community: Your community may already have an affinity for a certain design or program, and would be excited to purchase merchandise featuring it. For example, a zoo might create a t-shirt design featuring fan-favorite animals like elephants, pandas, or sea otters.
- Maximize color contrast: Ensure the colors you choose for your printed design pop against the item’s materials. High color contrast guarantees your artwork is easily readable from a distance and prevents your message from getting lost against a matching shirt background.
- Perfect graphic placement and scale: For standard t-shirts, center front designs and position them roughly two to three inches below the neckline, keeping the graphics at least an inch away from seams. Sizing the artwork correctly prevents the garment from feeling heavy and uncomfortable when worn.
- Upload high-resolution assets: If you’ll be uploading your nonprofit’s logo or artwork, ensure it’s in a vector or high-resolution format for clean, crisp print quality. Pixelated graphics look unprofessional, whereas crisp vectors ensure your merchandise reflects your standards.
- Choose the right products: Select high-quality, comfortable apparel options that your supporters will reach for. Focus on premium fabrics to ensure your merchandise ends up in supporters’ heavy rotation rather than at the bottom of a drawer.
3. Set up the storefront
Next, take the time to customize your storefront from a supporter’s perspective. Your storefront is the digital face of your campaign, and it needs to clearly communicate your mission and look professional to build trust.
You can achieve this by:
- Writing a compelling store description that clearly states your mission so buyers know exactly who and what their purchase will support.
- Customizing the visual branding by using your official logo and brand colors.
- Explaining the tangible impact by detailing what specific purchase amounts fund (e.g., “One hoodie provides three meals”).
- Enabling a donation option at checkout so passionate supporters can easily contribute extra funds.
4. Price items for maximum impact
Next, develop strategic pricing that balances compelling design and affordability with healthy profit margins. Platforms like Bonfire make this easy by providing default recommended prices optimized to strike the ideal balance.
However, your organization can still tailor prices as needed to align with your community’s preferences and fundraising goals by:
- Minimizing base costs by keeping your designs simple, as reducing ink colors and print locations lowers expenses.
- Adjusting the retail price to match your specific community—for instance, scaling it up or down from the default recommendation based on what your donors are comfortable paying.
- Leaving room for additional checkout donations by keeping base apparel prices reasonable.
5. Promote the store to your community
Finishing your designs, setting up your storefront, and launching your first campaign are all important accomplishments. But your digital storefront won’t generate revenue simply by existing. You’ll need to actively promote your ecommerce campaign to maximize reach and hit your fundraising goals.
Follow these steps to promote your campaign to supporters:
- Map out a promotional calendar. Consider scheduling your messaging around key campaign milestones such as launch day, the halfway mark, and the final countdown to the campaign deadline to maintain consistent momentum.
- Engage loyal supporters early. Reach out to your most passionate donors and volunteers to make the first purchases and share the store link with their personal networks.
- Get creative with social media messaging. Avoid sounding repetitive by alternating the messaging and formatting of your posts. For instance, you might highlight the design by sharing pictures of your staff modeling the apparel, show the real-world impact of the funds by spotlighting beneficiary stories, and create a sense of urgency with a campaign countdown.
- Centralize your storefront links with a link-in-bio tool on your social media profiles, making it convenient for followers across various platforms to find your shop.
- Leverage your existing email list to send targeted, visually appealing emails that announce the new merchandise, explain the cause it supports, and drive clicks to your store.
Additionally, remember to monitor campaign engagement metrics and sales as you go. See which platforms or merchandise styles are performing best, and adjust your promotional strategy to lean into what works.
6. Wrap up the campaign and review metrics
Once your campaign ends, follow up with supporters to foster long-term trust. Celebrate the collective impact your community made by sharing the final amount raised, highlighting the number of items sold, and stating how you’ll use the funds. Additionally, send a dedicated thank-you email to each supporter to communicate your gratitude.
Internally, use this time to analyze your campaign’s performance. Review which styles and designs generated the most revenue, identify which promotional channels had the highest conversion rates, and calculate your final profit. By analyzing these key data points, your team will know what works and what doesn’t, helping you refine your strategy for next time.
Tips for Success in Nonprofit Ecommerce
Looking to take your next campaign up a notch? Incorporate the following tips to expand your reach and earn more for your cause:
- Choose seasonal products: Select items that fit the season you are selling in. For instance, you might sell hoodies in the winter and lightweight tees for summer events.
- Offer limited-time drops: Cultivate a sense of urgency by offering specific shirt designs for only a short window before retiring them. These deadlines help nudge more hesitant buyers to make a decision.
- Leverage peer-to-peer sharing: Empower board members, volunteers, and other top advocates to share the store link on their personal social media profiles to tap into their networks. This simple action can introduce your mission to hundreds of potential new donors.
- Align merch with broader campaigns or initiatives: Tie specific t-shirt designs to upcoming awareness months, giving days, or annual fundraising galas to create cohesive marketing pushes. Merch should complement your existing calendar, not compete against it.
Launch your risk-free online store
Launching an online store shouldn’t force your nonprofit team to become experts in design, technology, or complex logistics. By using a zero-risk, print-on-demand platform like Bonfire, you can secure predictable revenue and turn supporters into advocates for your cause while focusing on your core mission. Get started today by kicking off your Bonfire campaign.
Additional Resources
- 17 Fundraising Products You Should Be Selling in 2026. Not sure where to start with your first ecommerce campaign? Check out these top products.
- What You Need to Know About Online Stores for Nonprofits. Learn more about launching your nonprofit’s online store.
- Top 20 Profitable Fundraising Ideas for Your Nonprofit. Explore these top fundraising ideas proven to drive funding for mission-driven organizations.